


Samsung Electronics unveiled its most advanced Odyssey gaming monitor lineup yet, introducing five new models that push the boundaries of resolution, refresh rates and immersive visual performance. Led by Samsung's first 6K 3D Odyssey G9, the 2026 lineup debuts world-first display technologies for gamers and creators, including the next-generation Odyssey G6 and three new Odyssey G8 models.
"With this year's Odyssey lineup, we're introducing display experiences that simply weren't possible even a year ago," said Hun Lee, Executive Vice President of the Visual Display (VD) Business at Samsung Electronics. "From the industry's first 6K glasses-free 3D monitor to breakthrough 1,040 Hz speed, we designed these monitors to meet the ambitions of today's gamers and deliver a level of immersion that fundamentally changes how content looks and functions on screen."


Odyssey 3D: The World's First 6K Glasses-Free 3D Gaming Monitor
The 32-inch Odyssey 3D (G90XH model) debuts the world's first 6K display with glasses-free 3D, introducing a new way to experience games on a monitor. Powered by real-time eye tracking, it adjusts depth and perspective in response to the viewer's position, creating a layered sense of dimension for smooth, uninterrupted gameplay without the need for a headset. With 6K resolution, a 165 Hz refresh rate boosted to 330 Hz through Dual Mode and a 1 ms GtG response time, fast action stays sharp and smooth. PC gamers can enjoy a high-quality expanded lineup of supported titles with optimized 3D effects developed in collaboration with game studios. Featured games such as The First Berserker: Khazan, Lies of P: Overture and Stellar Blade will offer added dimensionality that enhances terrain, distance and object separation beyond standard 2D gameplay.
Odyssey G6: The World's First 1,040 Hz Refresh Rate for High-Speed Gaming
The 27-inch Odyssey G6 (G60H model) gaming monitor advances competitive gaming with the world's first 1,040 Hz gaming monitor through Dual Mode and native QHD support up to 600 Hz, delivering esports-level motion clarity to help players track targets and see fine details during high-speed movement. When needed, the Odyssey G6 can boost performance in an instant, providing ultra-sharp resolution, so viewers can experience breathtaking worlds and ultra-high speeds that fuel competitive adrenaline. With support from both AMD FreeSync Premium and NVIDIA G-Sync Compatible, the Odyssey G6 ensures that every frame is smooth, every color pops and every moment feels responsive.
The AutoComplete list is a feature that displays suggestions for names and email addresses as you begin to type them. These suggestions are possible matches from a list of names and email addresses from the email messages that you have sent.
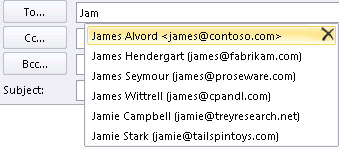
The method to copy your AutoComplete list from one computer to another depends on what type of email account you've added to Outlook. If you have a Microsoft 365 account, Exchange Server account, or an IMAP account (this is the most common type of other email account), then the AutoComplete list is stored as a hidden file in your Outlook Data File. See Copy the AutoComplete list for instructions.
If you have a POP3 account (less common, but often used for third-party email providers like Comcast, Earthlink, and Verizon), your AutoComplete list is stored in a file stored on your computer. See Copy and import an .nk2 file.
If you don't know what type of account you have, select File > Account Settings > Account Settings. You can find your account type here.
Copy the AutoComplete list
Step 1: Export the AutoComplete mailbox message
Exit Outlook, and then close Outlook on the web on all workstations that are connected to your mailbox.
Download and install MFCMAPI from http://mfcmapi.codeplex.com.
Run mfcmapi.exe.
On the Session menu, select Logon.
If you are prompted for a profile, select the desired profile name, and then click OK.
In the top pane, locate the line that corresponds to your mailbox, and then double-click it.
In the left-side navigation pane, expand Root Container, and then expand Top of Information Store or IPM_SUBTREE.
Right-click the Inbox folder, and then select Open Associated Content Table. This action opens a new MFCMAPI window that contains various properties.
Under the Subject column, right-click the item that has the subject, IPM.Configuration.Autocomplete, and then select Export Message. This action opens the Save Message To File window.
In the drop-down list, select MSG file (UNICODE), and then select OK.
Select a folder location to which you want to save the message, and then select Save. Note this location.
Step 2: Import the AutoComplete mailbox message
Exit Outlook, and then close Outlook on the web on all workstations that are connected to your mailbox.
Download and install MFCMAPI from http://mfcmapi.codeplex.com.
Run mfcmapi.exe.
On the Session menu, select Logon.
If you are prompted for a profile, select the desired profile name, and then click OK.
In the top pane, locate the line that corresponds to your mailbox, and then double-click it.
In the left-side navigation pane, expand Root Container, and then expand Top of Information Store or IPM_SUBTREE.
Right-click the Inbox folder, and then select Open Associated Content Table. This action opens a new MFCMAPI window that contains various properties.
To avoid duplicate entries, you must delete the existing AutoComplete message.
Note: Before you delete the IPM.Configuration.Autocomplete message, you must export the message by using the steps in the "How to export the Auto-Complete cache" section.
To delete the existing AutoComplete message, follow these steps:
In the Subject column, locate the item that has the subject, IPM.Configuration.Autocomplete.
Right-click the item, and then select Delete message. This opens the Delete Item window.
In the drop-down list, select Permanent deletion (deletes to deleted item retention if supported), and then select OK.
On the Folder menu, select Import, and then select From MSG.
Locate the .msg file that you created in step 11 of the "Export the AutoComplete mailbox message" procedure above, and then select OK.
In the Load MSG window that appears, select Load message into current folder in the Load style list, and then select OK.
The AutoComplete information is imported from the IPM.Configuration.Autocomplete_<hexadecimal code>.msg, where the placeholder<hexadecimal code> represents a long string of numbers and letters.
Copy and import an .nk2 file
Step 1: Copy the Auto-Complete file from the old computer
Because the default folder is hidden folder, the easiest way to open the folder is to use the command %APPDATA%\Microsoft\Outlook in the Windows Search box (or, browse to C:\Users\username\AppData\Roaming\Microsoft\Outlook).
In the Outlook folder, find your Auto-Complete List (.nk2) file.
Note: By default, file extensions are hidden in Windows. To change whether file extensions are shown, in Window Explorer on the Tools menu (in Windows 7 or Windows Vista, press the ALT key to see the Tools menu), click Folder Options. On the View tab select or clear the Hide extensions for known file types check box.
Copy the file to the new computer. The file is small and can be placed on a removable media such as a USB memory stick.
Step 2: Copy the Auto-Complete file to the new computer
On the new computer, in Control Panel, select or double-click Mail.
Mail appears in different Control Panel locations depending on the version of the Microsoft Windows operating system, the Control Panel view selected, and whether a 32- or 64-bit operating system or version of Outlook 2010 is installed.
The easiest way to locate Mail is to open Control Panel in Windows, and then in the Search box at the top of window, type Mail. In Control Panel for Windows XP, type Mail in the Address box.
Note: The Mail icon appears after Outlook starts for the first time.
Select Show Profiles.
Make a note of the name of the profile. You will need to change name of the .nk2 file to match this name later.
Copy the .nk2 file to the new computer in the folder in which Outlook configurations are saved. Because the default folder is hidden folder, the easiest way to open the folder is to use the command %APPDATA%\Microsoft\Outlook in the Windows Search box (or, browse to C:\Users\username\AppData\Roaming\Microsoft\Outlook).
After the file is copied to the folder, right-click the file, click Rename, and change the name to match the profile name that you noted in step 3.
Step 3: Import the Auto-Complete List
You are now ready to start Outlook and import the file, but you must start Outlook with a special one-time command.
Type outlook /importnk2 in the Windows Search box and then press Enter.
The Auto-Complete List should now have the entries from your other computer when you compose a message and begin typing in the To, Cc, or Bcc boxes.
How to fix "iPhone is disabled. Connect to iTunes" - 3 Ways
There are 3 main options for fixing a disabled iPhone — with iTunes & Finder, iPhone Unlocker software, and Find My iPhone feature. Either way, it will factory reset the iPhone and erase all your data and settings. Hopefully you have recent backup somewhere that you can restore the data from.
Option 1: How to unlock iPhone with iTunes & Finder
To connect the disabled iPhone to iTunes or Finder for restore, make sure you have a computer available to use. If not, borrow a friend's laptop.
Step 1: Make sure that the iPhone isn't plugged into your computer
Even if you do this, the computer doesn't recognize your iPhone.
Step 2: Enter Recovery Mode
If you have an iPhone 8 or newer model:
1. Press and hold the Side (also called Power, Sleep/Wake) button and either the Volume Up or Volume Down button until the power off slider appears.
2. Drag the slider to the right wait for the iPhone to power off.
3. Next, hold the Side button while connecting the disabled iPhone to the computer.
4. Keep holding the Side button until iTunes (or Finder) recognizes iPhone in Recovery mode.

If you have an iPhone 7 or iPhone 7 Plus:
1. Press and hold the Side button until you see the power off slider.
2. Swipe the slider to the right and wait for the iPhone to shut down.
3. Hold the Volume Down button while connecting the iPhone to the computer with USB cable.
4. Let go of the Volume Down button when the Recovery mode screen appears.

If you have an iPhone 6s or older model:
1. Press and hold the Side (or Top) button and wait for the "Slide to power off" bar to appear.
2. Turn off the iPhone.
3. Connect the iPhone to the computer while holding the Home button until you see the Recovery mode screen.

Step 3: Locate your iPhone in PC or Mac
Since macOS Catalina, Apple use the Finder app to handle syncing, backup, and restore tasks. In Windows, iTunes still takes care of everything.
On Mac running Catalina or newer macOS version
Open Finder app on your Mac, your iPhone should appear under Locations in the sidebar of the Finder window. Click the device name to select it.

On Mac running Mojave or older macOS version
Open iTunes on your Mac (make sure you have the latest version), and select the iPhone's icon in the upper-left corner of the window.
On PC running Windows
Once your iPhone is detected by the iTunes for Windows, click the device icon in the upper-left corner of the program window.
![]()
Step 4: Restore the iPhone to factory settings
Once you've selected your device, you should see the option to Update or Restore your iPhone. Click Restore to proceed.

The computer will start download the latest iOS software from official site and restore the disabled iPhone. This may take a few minutes. Your device might exit recovery mode if the download time takes over 15 minutes,. If that's the case, you'll need to shut off the iPhone and re-enter the recovery mode by repeating the steps outlined above again.
Wait for the iPhone to be erased completely, including all your data and screen passcode.
Step 5: Set up the iPhone and restore from backup
Go through the prompts on the iPhone to set up it. Along the way, you have the option to restore the iPhone with a recent backup.


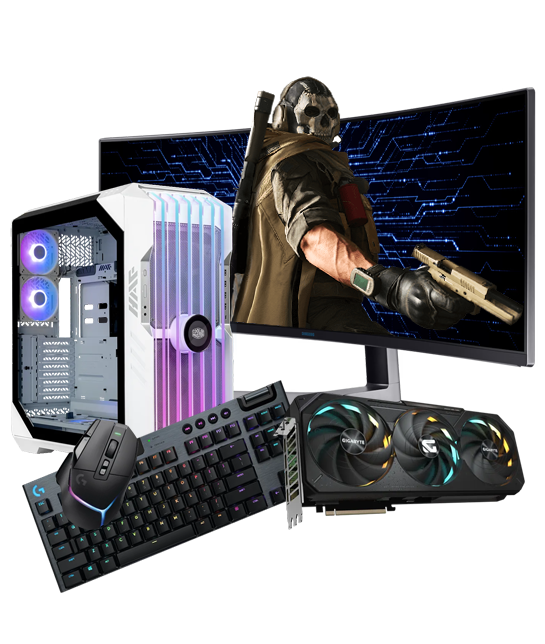
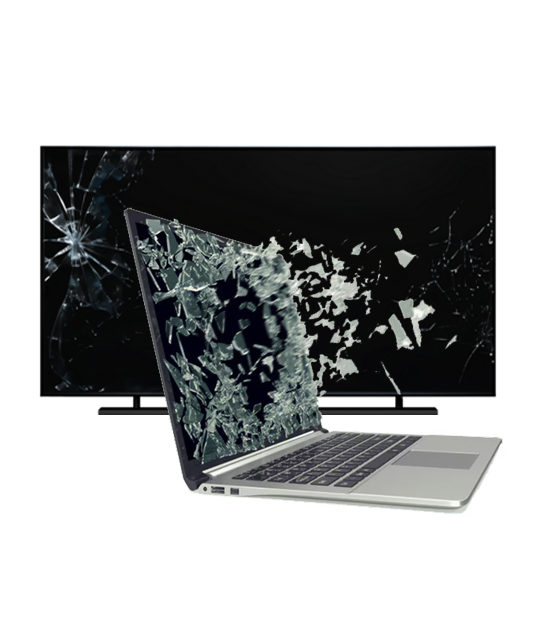
 Cases
Cases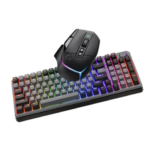 Computer Accessories
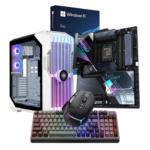 Computer Bundles
 Computer Support
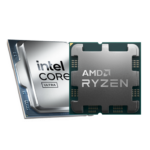 CPU’s
CPU’s Geek Caves
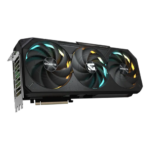 Graphics Card
 Hard Drives
 Laptops
 Memory
 Mini PC’s
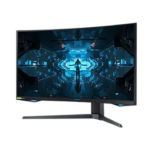 Monitors
 Motherboards
 Power Supplies
 Printers